ESP32: send IR codes with an IR LED
Build an ESP32 IR blaster that replays remote codes to control a TV or AC unit over the network. Pairs with the IR receiver tutorial to capture the codes first.
The IR receiver tutorial taught the input half: point any remote at a VS1838B and read button presses as hex values. This is the output half: an IR LED driven by the ESP32 replays those codes without the original remote in the room. The result is an IR blaster you can trigger from anything (HTTP, MQTT, a schedule), which turns “the AC remote is on the couch again” into “the AC turned off at midnight because a script said so.”
The trap: people wire an IR LED straight to a GPIO, aim it at the TV, and get nothing at three meters. A bare GPIO cannot push enough current into an LED to reach across a room. The fix is a transistor, and the second fix is remembering IR needs line of sight: light does not go through the couch cushion or around the corner.
What you need
Needed
- ESP32 dev board
- 2N2222 or BC337 NPN transistor (the range fix; do not skip it)
- 220 ohm resistor (LED current limit) and 1k ohm resistor
- IR receiver module (VS1838B, from the receiver tutorial) to capture
- Jumper wires and a breadboard
Nice to have
- 940 nm IR LED (a standard 5 mm one; the same kind inside remotes)
Wiring
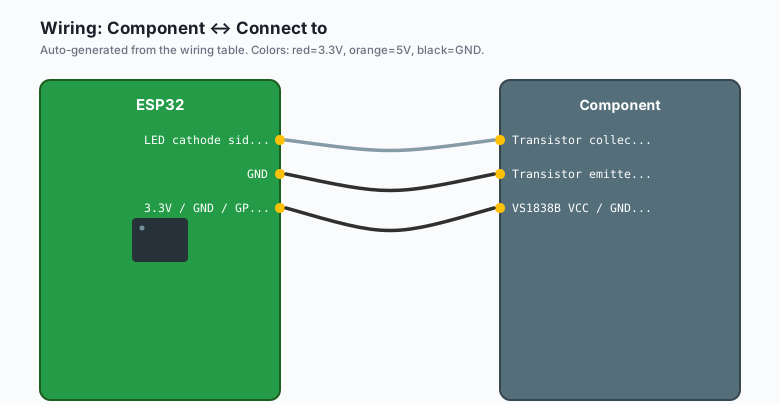
| Component | Connect to |
|---|---|
| IR LED anode (long leg) | Transistor collector, through the 220 ohm resistor from 5V |
| IR LED cathode (short leg) | 5V rail, through the 220 ohm resistor |
| Transistor collector | LED cathode side |
| Transistor emitter | GND |
| Transistor base | GPIO 12, through the 1k ohm resistor |
VS1838B VCC / GND / OUT | 3.3V / GND / GPIO 4 |
That LED drive layout drives the LED from 5 V with the transistor switching it: much brighter than a GPIO driving the LED directly, which is what gives the three-meter range.
Point the LED the same way the original remote points: at the device’s IR window. Tape it in place for a permanent install. Most failures in the field are aiming, not electronics.
Install
In the Arduino IDE: Sketch >> Include Library >> Manage Libraries >> search IRremoteESP8266 by David Conran et al.
Install it. It sends and receives, so this tutorial and the receiver
tutorial use the same library.
The code
Step 1: capture the codes you need
Run the receiver sketch from the IR receiver tutorial, press each
button you care about, and write down the protocol and hex value
(e.g. NEC 0x20DF10EF for power on one LG TV). This step is
device-specific and there is no shortcut: remotes differ.
Step 2: send them
#include <IRremoteESP8266.h>
#include <IRsend.h>
#include <WiFi.h>
#include <WebServer.h>

const uint16_t IR_PIN = 12;      // transistor base via 1k
IRsend irsend(IR_PIN);

WebServer server(80);

// Values captured with the receiver tutorial's sketch, one per button
const uint64_t TV_POWER   = 0x20DF10EF;   // NEC
const uint64_t TV_VOL_UP  = 0x20DF906F;
const uint64_t AC_OFF     = 0x8F710BE;    // example 28-bit AC code

void setup() {
  Serial.begin(115200);
  irsend.begin();
  WiFi.begin("your-wifi-ssid", "your-wifi-password");
  while (WiFi.status() != WL_CONNECTED) { delay(300); }
  Serial.println(WiFi.localIP());

  server.on("/tv/power", []() {
    irsend.sendNEC(TV_POWER);
    server.send(200, "text/plain", "sent tv power");
  });
  server.on("/tv/volup", []() {
    irsend.sendNEC(TV_VOL_UP, 30);   // repeat 30x = hold the button down
    server.send(200, "text/plain", "sent vol up x30");
  });
  server.on("/ac/off", []() {
    irsend.sendNEC(AC_OFF);
    server.send(200, "text/plain", "sent ac off");
  });
  server.begin();
}

void loop() {
  server.handleClient();
}
Upload, then from any device on the network:
curl http://esp32-ip/tv/powerand the TV turns off. Any trigger you already have can now call that URL (e.g. the MQTT tutorial’s flow, an ntfy button, a cron job on the Pi at midnight).
AC units are a different animal
TV remotes send one command per button. AC remotes send the entire
state (temp, fan, mode, swing) as one long blob every press. If you
replay an old AC code after someone changed the temperature with the
physical remote, you revert the whole unit. The library has
protocol-specific sender classes for the common AC brands (e.g.
IRPanasonicAc, IRMitsubishiAC, IRDaikinESP) that let you set
state fields properly:
#include <ir_Panasonic.h>

IRPanasonicAc panasonic;
panasonic.begin(IR_PIN);
panasonic.setModel(kPanasonicDke);
panasonic.on();
panasonic.setTemp(22);
panasonic.setFan(kPanasonicFanAuto);
panasonic.send();   // transmits the complete state
Find your brand in the library’s examples folder (each supported AC
protocol has a sender example with a printState() that decodes what
you captured, which is the honest way to verify a model guess).
What you learned
- An IR LED needs transistor drive from 5 V to get real range; a bare GPIO reaches about a meter.
- IRremoteESP8266 sends with
sendNEC(code)and repeats with a count (e.g. 30 repeats is a held volume button). - Capture codes with the receiver tutorial first; every remote’s values are its own.
- AC units send whole-state blobs; use the brand sender classes instead of replaying raw codes.
When something breaks
- Nothing happens under three meters. The LED is GPIO-driven instead of transistor-driven, or the resistor is 1k instead of 220 ohm. Rebuild the drive circuit; this is the number one cause.
- Works at close range, not across the room. Aiming, or the LED is behind the device’s own IR window glare shield. Move the LED, test with a phone camera (the LED shows as a purple flash on camera; a good blaster is clearly visible).
- The device responds to some commands, not others. Your
captured hex came from a repeat frame or a different protocol than
you assumed. Recapture that button, note the protocol
typeToStringreports, and send with the matchingsend*function. - The AC toggles the wrong mode. You replayed a stale full-state code. Switch to the brand-specific AC sender class and set state fields explicitly.
- The web endpoints return nothing. The IR burst blocks the CPU for ~100 ms per repeat burst, so the server answers late; the default HTTP timeout on some clients is shorter. Send repeats asynchronously or lower the count.
What to build next
- The IR receiver tutorial is the capture half of this; run both sketches from one board to make a learnable universal blaster.
- Wire this into the MQTT publish-subscribe tutorial so any
topic (e.g.
home/ir/send) triggers a code instead of an HTTP call. - The home sensor hub tutorial plus a blaster is a whole-room controller: sense and act from one board.
- The book IoT with ESP32 bundles receiver and transmitter into an IR hub project with a web UI.