ESP32: control an LED with Matter over Wi-Fi from Apple Home or Google Home
Build a Matter over Wi-Fi on/off light on an ESP32 and pair it with Apple Home and Google Home. The QR code flow, Wi-Fi provisioning gotcha, and what to do when Apple says accessory not found.
I built a Matter light on an ESP32 last weekend because I wanted to see how much of the Apple Home and Google Home setup I could do without a vendor app at all. The answer is: most of it. Both apps scan a QR code printed in the serial monitor, the device joins your Wi-Fi through the Matter flow, and you end up with a tile in Apple Home that turns an LED on and off by tapping it. No vendor cloud, no Tuya, no account.
The trap I want to be honest about is Wi-Fi credentials. A Matter device does not get its Wi-Fi password the way a normal IoT device does (e.g. hard-coded SSID, captive portal, or a vendor app that pushes the creds). The Matter commissioning flow itself hands the credentials to the device, encrypted, during the QR-code scan. If you skip that step or hard-code Wi-Fi, the device commissions but never comes online. I did that twice before I read the spec.
This tutorial is ESP32 only. Matter is a smart-home protocol, not a hobbyist protocol, and the only chips with first-class Matter support today are the ESP32 family (regular ESP32, ESP32-S3, ESP32-C3, ESP32-C6, plus the ESP32-H2 for Thread). The Raspberry Pi Pico does not have Matter support in any shipping SDK. If you want to run Matter on a Pi, you are doing it through Linux and a Thread radio, which is a different project.
What Matter is, in one paragraph
Matter is the new smart-home standard backed by Apple, Google, Amazon, Samsung, and the Connectivity Standards Alliance (the CSA, formerly the Zigbee Alliance). The promise is that one device works in every ecosystem: a Matter bulb from any vendor pairs with Apple Home, Google Home, Alexa, SmartThings, and Home Assistant without a vendor-specific bridge. The protocol is open, the SDKs are open source, and the certification gets you a Matter logo and a setup code.
Underneath, Matter is a set of “device types” (e.g. On/Off Light, Dimmable Light, Temperature Sensor, Door Lock) defined by a data model of “clusters.” A Light has an On/Off cluster. A Sensor has a Temperature Measurement cluster. The app you use does not matter as long as it speaks Matter, because the cluster data model is the same for everyone. This is the part of the spec that makes Matter work across ecosystems. It is also the part that limits you: if your device does not fit a standard device type, you cannot make it work in Apple Home without a custom HomeKit integration. Matter itself does support custom device types, but Apple Home and Google Home only ship support for the standard ones.
The On/Off Light device type
The On/Off Light is the simplest Matter device you can build. It has exactly one cluster the user can see: the On/Off cluster. Your firmware exposes a single boolean (on or off), and the user’s app renders a single tile that toggles that boolean. There is no brightness, no color temperature, no scene support. If you want dimming, you build a Dimmable Light, which adds the Level Control cluster. We are starting with On/Off because it is the smallest thing that proves the rest of the stack works (commissioning, Wi-Fi provisioning, app pairing, command dispatch).
When Apple Home or Google Home pairs your device, they read the device type out of the Matter data model and render the right UI automatically. You do not have to tell Apple Home “I am a light.” The device tells Apple Home by virtue of what clusters it implements.
Two SDKs, one of which you want
Espressif ships two ways to build Matter devices. The first is the esp-matter SDK, which is Espressif’s official Matter SDK built on top of the open-source Matter reference implementation. The second is the Arduino Matter library, which wraps esp-matter for the Arduino IDE. The Arduino wrapper is fine for blinking an LED or reading a sensor, but it hides most of the configuration you actually want for a real product (e.g. commissioning window timeout, fabric allowlist, OTA provider, attestation certificates).
For this tutorial I am using the esp-matter SDK directly. It is more code, but you can read every line and change every setting. The Arduino library is fine for a 5-minute demo and frustrating for anything that needs to ship.
The QR code and setup code
Every Matter device has a setup payload. It is a string of digits that encodes the vendor ID, product ID, commissioning flow, and a per-device discriminator. The setup payload is what your phone reads when you scan the QR code on the device or the box.
The QR code is a base-38 encoding of the setup payload plus a 6-digit setup passcode. Espressif’s esp-matter SDK generates both at boot and prints the QR code to the serial monitor as a URL. You scan that URL with Apple Home (+ button >> Add Accessory >> More Options… >> scan QR) or Google Home (the equivalent path is Settings >> Works with Google >> Set up device >> Matter). The 6-digit setup passcode is the fallback for when the camera cannot read the QR.
A few things the setup code is not. It is not your Wi-Fi password. It is not a cloud account. It is not tied to a vendor. It is just a one-time pairing code that lets the commissioner (your phone) start a secure commissioning handshake. After commissioning, the code is irrelevant.
The Wi-Fi credentials provisioning gotcha
Here is the part I got wrong twice. A Matter device does not know your Wi-Fi password before commissioning. It cannot know: there is no way to put it on a sticker, and you do not want it hard-coded anyway. The Matter commissioning flow itself is what delivers the Wi-Fi credentials to the device.
The flow looks like this. Your phone (the commissioner) has your home Wi-Fi credentials because it is already on your home Wi-Fi. When you scan the QR code, the commissioner opens a commissioning channel over Bluetooth Low Energy. Through that channel, the commissioner hands the device the Wi-Fi SSID and password, encrypted, plus the Thread or Wi-Fi network operational credentials. The device then joins the network on its own. The phone does not “push” the device onto the network. The device joins the network itself, using credentials it received during commissioning.
This is the “Wi-Fi credentials provisioning” gotcha. If you hard-code WiFi.begin("MySSID", "MyPassword") in your firmware and skip the commissioning flow, the device will work for you but it will not work for the person you hand it to. Worse, if the device ever resets to factory defaults, it will not pick up new Wi-Fi unless you re-run commissioning. The Matter way is to have the firmware not contain Wi-Fi credentials at all and let commissioning provide them every time.
esp-matter handles all of this for you. You do not write the BLE commissioning code. You do not write the Wi-Fi credential handoff. You declare a Wi-Fi commissioning flow in your menuconfig and the SDK does the rest. The thing you write is the LED control logic.
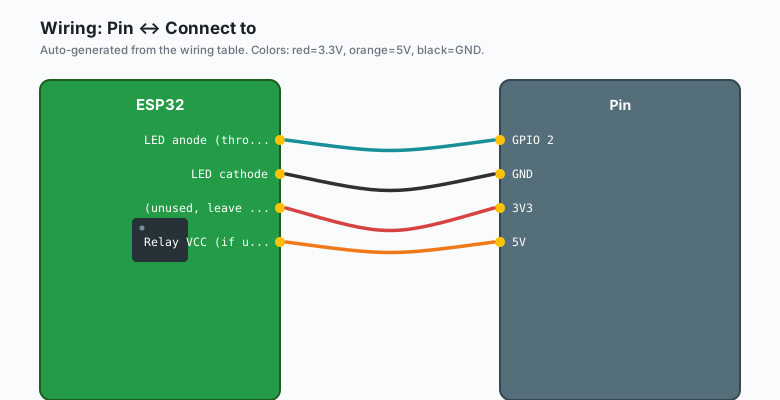
Wiring
| Pin | Connect to |
|---|---|
GPIO 2 | LED anode (through 220Ω) |
GND | LED cathode |
3V3 | (unused, leave for relay) |
5V | Relay VCC (if using a relay) |
The on-board LED on most ESP32 dev boards is on GPIO 2 and is active LOW. If you use a bare LED, drive it active HIGH through a 220Ω resistor. If you use a relay module, drive the relay signal pin from GPIO 2 and put the load on the relay’s screw terminals.
The code
This is the full app_main.cpp for an On/Off Light using esp-matter. It is shorter than you think.
#include <esp_log.h>
#include <esp_matter.h>
#include <esp_matter_console.h>
#include <esp_matter_ota.h>

#include <app_priv.h>

using namespace chip::app::Clusters;
using namespace esp_matter;

static const char *TAG = "app_main";

static void app_event_cb(const ChipDeviceEvent *event, intptr_t arg)
{
    switch (event->Type) {
        case chip::DeviceLayer::DeviceEventType::kCommissioningComplete:
            ESP_LOGI(TAG, "Commissioning complete");
            break;
        case chip::DeviceLayer::DeviceEventType::kFailSafeTimerExpired:
            ESP_LOGI(TAG, "Commissioning failed, safe to retry");
            break;
        default:
            break;
    }
}

static esp_err_t app_identification_cb(identification::callback_args_t *args)
{
    // Trigger the identify effect (e.g. LED blink for 30s)
    return ESP_OK;
}

static esp_err_t app_attribute_update_cb(attribute::callback_args_t *args)
{
    if (args->cluster_id == OnOff::Id) {
        if (args->attribute_id == OnOff::Attributes::OnOff::Id) {
            bool on = args->matter_value->val.b;
            gpio_set_level(GPIO_NUM_2, on ? 1 : 0);
            ESP_LOGI(TAG, "OnOff set to %d", on);
        }
    }
    return ESP_OK;
}

extern "C" void app_main()
{
    esp_err_t err = ESP_OK;

    // 1. Init the Matter node
    node::config_t node_config;
    node_t *node = node::create(&node_config, app_attribute_update_cb, app_identification_cb);
    if (!node) {
        ESP_LOGE(TAG, "Failed to create Matter node");
        return;
    }

    // 2. Add the On/Off Light endpoint
    on_off_light::config_t light_config;
    endpoint_t *light_endpoint = on_off_light::create(node, &light_config, ENDPOINT_FLAG_NONE, NULL);
    if (!light_endpoint) {
        ESP_LOGE(TAG, "Failed to create on/off light endpoint");
        return;
    }

    // 3. Init the GPIO for the LED
    gpio_reset_pin(GPIO_NUM_2);
    gpio_set_direction(GPIO_NUM_2, GPIO_MODE_OUTPUT);

    // 4. Start Matter
    err = esp_matter::start(app_event_cb);
    if (err != ESP_OK) {
        ESP_LOGE(TAG, "Failed to start Matter, err:%d", err);
    }
}
The two callbacks do all the work. app_attribute_update_cb fires when a commissioner (Apple Home, Google Home, Alexa) writes to the On/Off cluster. You read the new value and drive the GPIO. That is the whole LED control. Everything else is Matter boilerplate.
Apple Home, step by step
The first commissioning is the slowest part. After that, the device is in your Home and you can add it to rooms and automations.
- Open the Apple Home app
- Tap
+in the top right - Tap “Add Accessory”
- Tap “More Options…” (the camera will not find the device by Bluetooth alone the first time)
- Tap the entry for your device (it shows up as the product name from the matter data model)
- If the camera prompt appears, scan the QR code printed in the serial monitor. If it does not, tap “Enter Setup Code” and type the 8-digit code from the serial monitor
- Confirm the warning that the accessory is not certified (this is normal for DIY devices)
- Name the accessory, assign it to a room, and tap Done
The device will appear in the room you assigned it to. Tap the tile to toggle the LED.
Google Home, step by step
- Open the Google Home app
- Tap
+>> Set up device >> Works with Google - Find “Matter” in the list (or your custom Matter provider if you set one up)
- Tap the device and either scan the QR code or tap “Set up without scanning” to enter the 8-digit code
- Assign the device to a room, name it, and tap Done
The tile appears in the room and behaves the same as the Apple Home tile. Toggle the LED from your phone.
Does it work with Alexa
Yes, with the Matter skill. Open the Alexa app, go to Skills, search for “Matter,” enable the skill, and follow the same scan-or-enter-code flow. Alexa will add the device to your Alexa account and you can ask “Alexa, turn on the workshop light.” The skill is free and there is no vendor account required.
The thing you cannot do with Matter
You cannot expose custom attributes. If you want a light that reports its temperature, its energy use, and whether the bulb is faulty, you have to use one of the standard device types. Matter supports custom device types, but Apple Home and Google Home do not render them. The user will see “no compatible devices” in the app. If you need a custom attribute, you have to use a vendor cloud or HomeKit directly. Matter is a standard. The standard wins.
When something breaks
- “Accessory Not Found” in Apple Home: the device is not advertising BLE, or the QR code printed in the serial monitor is the wrong format. Check that
esp-matteris initialized before the BLE stack, and that the QR code starts withMT:. - Device commissions but never comes online: Wi-Fi credentials were not received. Confirm you did not hard-code
WiFi.begin(). The commissioning flow is the only path that should be writing Wi-Fi credentials. - Apple Home says “Accessory Not Certified”: normal for DIY devices. Tap “Add Anyway.”
- LED does not toggle when the app says it did: the
attribute_update_cbis not registered. Confirm you passedapp_attribute_update_cbtonode::create. - Commissioning times out: the BLE radio is not staying alive long enough. Increase the commissioning window timeout in
menuconfig.
What to build next
A Dimmable Light is the same code with the Level Control cluster added. A Temperature Sensor (next tutorial) is a different device type but the same Matter data model pattern. If you want a real product out of this, the next step is Matter certification through the CSA test harness.