ESP32: hosted MQTT brokers vs self-hosting
Compare EMQX and HiveMQ free tiers against Mosquitto on a Raspberry Pi, wire an ESP32 to each, and pick the right broker for your home.
Last month I hit HiveMQ’s connection limit on a Tuesday afternoon because I left a test loop running with a 100 ms publish interval. The broker did exactly what free tiers do: it stopped accepting connections and my dashboard went blank until the counter reset. Nothing broke. But the lesson stuck: when your home automation depends on somebody else’s free tier, you are renting your infrastructure from a company that will eventually change the pricing page.
The trap here is that the comparison looks obvious in the wrong direction. Hosted brokers win the first hour (no server, no config, TLS included). Self-hosting wins every hour after that, because the broker stops being a dependency on someone else’s decisions. This post is the honest version of that comparison, with the same ESP32 sketch pointed at both.
What you need
Needed
- ESP32 dev board (e.g. ESP32-DevKitC, about $8).
- A Raspberry Pi (Pi 3B+ or newer, any model with Ethernet or Wi-Fi). This is the self-hosting half. If you already run one for Pi-hole or Home Assistant, you are done; it has room for a broker too.
- MicroSD card for the Pi (16 GB is plenty).
- 2 jumper wires, female-female.
Nice to have
- Soldering iron + solder, if your ESP32 board ships with a bare header to attach.
- Soldering iron stand, for a safe place to park the hot iron.
- Helping hands, to hold the header straight while soldering.
- Anti-static wristband, when handling bare modules on a dry winter day.
- Wire stripper, for clean wire ends.
Wiring
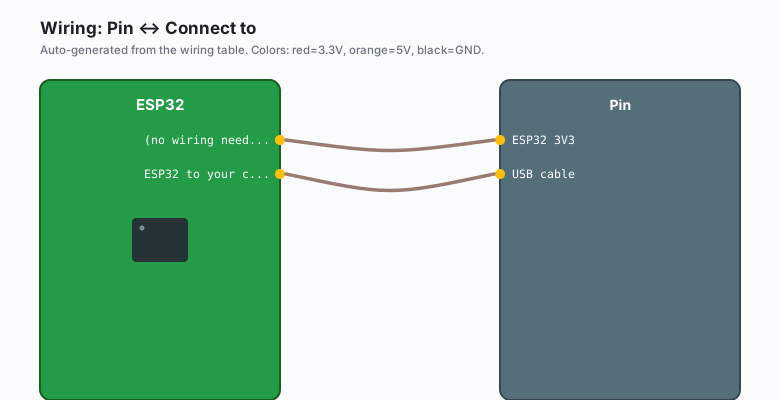
| Pin | Connect to |
|---|---|
| ESP32 3V3 | (no wiring needed for MQTT; this is a network tutorial) |
| USB cable | ESP32 to your computer for flashing and Serial output |
The only hardware in this tutorial is the ESP32 itself. MQTT is a network protocol, so the “wiring” is TCP port 1883 (or 8883 with TLS). If you want a physical project to publish from, grab the wiring from the DHT22 tutorial and publish that temperature.
Install
On the Raspberry Pi (Mosquitto)
sudo apt update
sudo apt install -y mosquitto mosquitto-clients
Then edit the config:
sudo nano /etc/mosquitto/conf.d/local.confand add:
listener 1883
allow_anonymous false
password_file /etc/mosquitto/passwd
Create the password file and restart:
sudo mosquitto_passwd -c /etc/mosquitto/passwd brian
sudo systemctl restart mosquitto
Test it from another terminal:
mosquitto_sub -h <pi-ip-address> -u brian -P yourpassword -t "test/#"
mosquitto_pub -h <pi-ip-address> -u brian -P yourpassword -t "test/hello" -m "hi"
If the sub terminal prints hi, your broker works. That took maybe ten
minutes, and none of it was a pricing page.
In the Arduino IDE
Arduino IDE >> Tools >> Board >> esp32 >> install if you have not already. Then Arduino IDE >> Sketch >> Include Library >> Manage Libraries >> search “PubSubClient” >> install Nick O’Leary’s PubSubClient.
The comparison table you actually want
| EMQX Cloud serverless | HiveMQ Cloud free | Mosquitto on a Pi | |
|---|---|---|---|
| Cost | Free tier, then per-message | Free tier, 100 connections | Free, runs on hardware you own |
| Connections on free tier | Small free tier, then paid | 100 devices | Bounded by the Pi (hundreds easily) |
| Data retention | Configurable, then paid | Messages not stored on free tier | As long as your SD card lives |
| TLS | Included | Included, with SNI | Yes, with a cert and more config |
| Uptime guarantee | None on free tier | None on free tier | None, but you control restarts |
| Data leaves your house | Yes | Yes | No |
| Dies when | You hit the free tier cap | You hit the cap or they change terms | Your SD card dies (back it up) |
| Real failure mode | Silent throttling, quota alerts | Connection refusals at the cap | Power blips, fixable with a watchdog |
I am not going to pretend the hosted tiers are bad. They are good at what they do (e.g. a HiveMQ free tier behind a demo you show a client, or an EMQX serverless cluster for a project whose hardware lives in three countries). The dishonest version of this comparison pretends free-tier limits do not exist. The other dishonest version pretends a Pi in a closet is enterprise-grade. Both are true at the same time, which is why the recommendation below has a condition attached.
The code
The same sketch works against all three brokers. Only the constants change. This publishes a heartbeat every 10 seconds:
#include <WiFi.h>
#include <PubSubClient.h>

// ---- Pick ONE broker config ----

// A) Mosquitto on your Pi (self-hosted, default recommendation)
const char* WIFI_SSID   = "your-wifi";
const char* WIFI_PASS   = "your-password";
const char* MQTT_HOST   = "192.168.1.50";  // the Pi's IP
const int   MQTT_PORT   = 1883;
const char* MQTT_USER   = "brian";
const char* MQTT_PASS   = "yourpassword";

// B) HiveMQ Cloud free tier
// const char* MQTT_HOST = "abcd1234efgh.s1.eu.hivemq.cloud";
// const int   MQTT_PORT = 8883;
// const char* MQTT_USER = "your-hivemq-user";
// const char* MQTT_PASS = "your-hivemq-pass";
// (keep TLS on; HiveMQ Cloud requires it on 8883)

// C) EMQX serverless
// const char* MQTT_HOST = "xxxx.ala.cn-hangzhou.emqxsl.cn";
// const int   MQTT_PORT = 8883;
// (same TLS notes as HiveMQ)

WiFiClientSecure tlsClient;   // for 8883
// WiFiClient plainClient;    // for 1883 against your own broker
PubSubClient mqtt(tlsClient);

unsigned long lastPublish = 0;

void connectWiFi() {
  WiFi.begin(WIFI_SSID, WIFI_PASS);
  while (WiFi.status() != WL_CONNECTED) {
    delay(500);
    Serial.print(".");
  }
  Serial.println();
  Serial.print("WiFi OK, IP: ");
  Serial.println(WiFi.localIP());
}

void connectMQTT() {
  while (!mqtt.connected()) {
    String clientId = "esp32-" + String((uint32_t)ESP.getEfuseMac(), HEX);
    bool ok = mqtt.connect(clientId.c_str(), MQTT_USER, MQTT_PASS);
    if (ok) {
      Serial.println("MQTT connected");
    } else {
      Serial.print("failed, rc=");
      Serial.print(mqtt.state());
      Serial.println(" retrying in 2s");
      delay(2000);
    }
  }
}

void setup() {
  Serial.begin(115200);
  delay(1000);
  // For a quick test we skip CA verification. For anything real, pin
  // the broker's CA cert (see the TLS in depth tutorial).
  tlsClient.setInsecure();
  mqtt.setServer(MQTT_HOST, MQTT_PORT);
  mqtt.setBufferSize(512);
  connectWiFi();
  connectMQTT();
}

void loop() {
  if (!mqtt.connected()) connectMQTT();
  mqtt.loop();

  if (millis() - lastPublish > 10000) {
    lastPublish = millis();
    char payload[64];
    snprintf(payload, sizeof(payload),
             "{\"heap\":%u,\"rssi\":%d}", ESP.getFreeHeap(), WiFi.RSSI());
    mqtt.publish("home/esp32/heartbeat", payload);
    Serial.print("published: ");
    Serial.println(payload);
  }
}
For option A, swap WiFiClientSecure tlsClient for WiFiClient plainClient and drop the setInsecure() line. Port 1883 on your own
LAN is fine; the Pi never talks to the internet for this.
For options B and C you are on 8883 with TLS, and setInsecure() skips
certificate verification. That is fine for a weekend test and wrong for
anything you actually care about (the TLS in depth tutorial shows the
cert-pinning version).
Which one should you actually run
Default to Mosquitto on the Pi. Here is the reasoning, honestly stated:
- Your data stays in your house. Whole-house energy data, door events, presence: that is a profile of your life. I do not hand that to a free tier.
- No quotas. A 100 ms publish loop will not get you throttled.
- No terms-of-service risk. Cloud free tiers change. A Pi does not read its own pricing page.
- It composes with everything else you self-host (Node-RED, InfluxDB, Home Assistant all eat MQTT from the same broker).
When hosted is the right call: the broker must be reachable from multiple locations you do not control, you cannot punch a hole through the network (campus Wi-Fi, corporate NAT), or you genuinely want zero servers. In those cases HiveMQ Cloud’s free tier is the one I would pick (100 connections, TLS enforced, decent dashboard). EMQX serverless is the better fit when you might grow into their paid tier, because the migration is a config change instead of a replatform.
One more honest note: self-hosting means you are the ops team. If the
Pi reboots, your broker is down until it comes back. Add
sudo systemctl enable mosquitto so it starts on boot, put the Pi on a
small UPS if the power blips matter, and put a watchdog on the ESP32
side so it reconnects (the reconnect logic above already does).
What you learned
- MQTT brokers are swappable infrastructure: the same sketch runs against Mosquitto, HiveMQ Cloud, or EMQX serverless with only constants changed.
- Hosted free tiers trade control for convenience, and the trade goes badly exactly when your project starts working.
- The self-hosted default is Mosquitto on a Pi: free, local, no quotas, and it slots into the rest of your home server stack.
- Port 1883 is plain MQTT; 8883 is MQTT over TLS. Cloud brokers force TLS; your own broker can too when it faces the internet.
When something breaks
- rc=-2 on connect (option A). The broker is not reachable. Ping
the Pi. Then check
sudo systemctl status mosquittoand make sure the listener config actually saved. The most common cause is editing/etc/mosquitto/mosquitto.confinstead of a file inconf.d/. - rc=-2 on connect (options B/C). You forgot TLS. Cloud brokers on
8883 need
WiFiClientSecure, notWiFiClient. If you see a certificate error withsetInsecure()removed, that is the missing CA cert, not a wrong password. - Connection works, publishes vanish. The default PubSubClient
buffer is 256 bytes and some cloud brokers require larger packets.
Call
mqtt.setBufferSize(512)beforesetServer(). - Password auth fails on your own Mosquitto. You created the
password file but forgot to restart the service, or
allow_anonymousis still true with nopassword_fileline. Restart, then test withmosquitto_pubfrom a laptop before blaming the ESP32. - Works on the bench, dies on your Wi-Fi. Some routers isolate wireless clients (AP isolation). The ESP32 cannot see the Pi. Disable client isolation for your IoT network or move both onto 2.4 GHz.
What to build next
- The MQTT publish-subscribe tutorial is the protocol-level follow up: topics, QoS, retained messages, and last-will.
- The ntfy notifications tutorial pushes a message to your phone from the same ESP32 when a threshold trips (e.g. publish to MQTT and fire an ntfy alert from the same loop).
- The Raspberry Pi Mosquitto tutorial goes deeper on the broker side: bridging, websockets, and keeping the broker alive across reboots.
- The ADS1115 external ADC tutorial pairs with this for real sensor data worth publishing.